If you have been searching for wondershare filmora download, you are probably looking for a video editor that gives you more control than a basic mobile editing app without throwing you straight into the complexity of professional software.
That middle ground is where Wondershare Filmora has built its reputation. It combines the familiar timeline layout used by desktop video editors with drag-and-drop effects, templates, automatic captions, background removal, AI-assisted editing tools, and ready-made social media formats. For someone editing a first YouTube video, TikTok clip, travel montage, product video, or presentation, the learning curve is noticeably easier than what you get from many professional editing suites.
Filmora is available for Windows and macOS, while a separate Filmora mobile experience is available on Android, iPhone, and iPad. You can download and try the desktop software without paying upfront, but there is an important catch: videos exported with the free version normally carry a Filmora watermark. If you intend to publish finished videos regularly, you will eventually need to consider one of the paid licenses.
In this guide, I will walk through the Filmora download process, installation, system requirements, pricing choices, editing features, mobile versions, safety considerations, and the common problems new users tend to run into.
I. Introduction to Wondershare Filmora
A. What Is Filmora?
Wondershare Filmora is a cross-platform video editing program designed to make timeline-based editing approachable for ordinary users.
At its core, it works like most traditional editors. You import videos, photos, and audio into a media library, drag them onto a timeline, trim clips, rearrange scenes, add transitions, adjust audio, insert text, and export the finished project.
Where Filmora differs is in how much of the complicated work it tries to simplify.
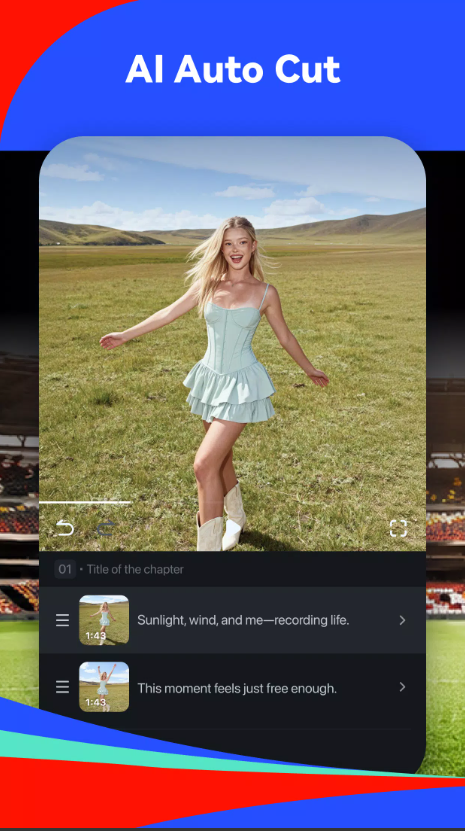
Instead of expecting you to build every title animation or visual effect from scratch, Filmora includes presets and templates. Instead of manually masking a person frame by frame, AI-assisted tools can handle part of the job. Automatic subtitle tools can convert speech into captions, while other AI features can clean up footage, generate music, remove unwanted objects, or help prepare short-form content.
It is still a real desktop editor, but it does not assume you already understand professional editing terminology.
B. Why Download Filmora?
For me, Filmora makes the most sense for users who have outgrown extremely basic editors but do not want to spend weeks learning professional post-production software.
It is especially suitable for:
-
YouTube creators
-
TikTok and Instagram creators
-
Students
-
Small businesses
-
Teachers
-
Beginner video editors
-
Vloggers
-
Gaming creators
-
Product reviewers
-
Casual home-video editors
You can make relatively polished videos without manually building every animation, title, transition, or audio effect.
The downside is that convenience increasingly comes through templates, online assets, AI credits, and premium features. If you want complete control without subscriptions or online services, another editor may suit you better.
C. Available Platforms: Windows, Mac, and Mobile
Filmora is available on Windows and macOS for desktop editing.
There is also a Filmora mobile app for Android and iOS/iPadOS. The mobile version shares the same general philosophy—quick editing, templates, AI tools, music, text, filters, and social-media-friendly exports—but it is not simply the desktop interface squeezed onto a phone.
If I am editing a long YouTube video with multiple audio and video tracks, I prefer desktop Filmora.
For a quick vertical Reel or TikTok clip, the mobile version can be more convenient.
II. How to Download Filmora on Windows
A. Official Website Download Steps
For a normal wondershare filmora download, I strongly recommend starting with Wondershare's official Filmora website.
The process is simple:
-
Open the official Filmora website.
-
Choose the Windows download option.
-
Download the Filmora installer.
-
Open your Downloads folder.
-
Double-click the downloaded installation file.
-
Approve the Windows security prompt if it appears.
-
Follow the installer instructions.
-
Launch Filmora after installation.
The initial downloader may be relatively small because additional program files can be retrieved during installation.
Make sure you have a stable internet connection before starting.
B. Filmora Installer File (.exe)
Windows applications normally use an .exe installation file, and Filmora follows that standard installation process.
You may see a filename containing terms such as Filmora, setup, or installer.
Before opening it, check that you downloaded the file directly from Wondershare rather than from an advertisement pretending to be a download button.
That distinction matters more than it sounds.
Software download searches often contain sponsored listings, mirrors, old installers, and third-party download portals. Some simply bundle the legitimate program, but others can include extra installers or outdated releases.
For editing software that may access your videos, microphone, camera, cloud files, and account information, I prefer the official installer.
C. Minimum Windows System Requirements
Modern Filmora releases are designed for 64-bit Windows computers.
A practical minimum setup should include:
-
A supported 64-bit Windows installation
-
At least 8 GB of RAM
-
A modern multi-core Intel or AMD processor
-
A graphics processor compatible with Filmora's hardware acceleration
-
Around 10 GB of free disk space for the program itself
-
Additional space for video files, cache files, proxies, and exported projects
For HD or 4K editing, 16 GB of RAM is a much more comfortable starting point.
This is one area where the official “minimum” and what I would actually recommend are different.
Filmora might technically launch on an older computer with 8 GB of RAM, but editing several 4K clips, AI effects, multiple layers, and high-resolution previews can become frustrating.
If you regularly edit 4K footage, prioritize a newer CPU, dedicated GPU, SSD storage, and at least 16 GB of memory.
III. How to Download Filmora on Mac
A. Official Website Download Steps
Mac users can also download Filmora directly from Wondershare.
Go to the Filmora website and choose the macOS version. Your browser should download the Mac installation package.
Once the download finishes:
-
Open your Downloads folder.
-
Double-click the Filmora installation file.
-
Follow the macOS installation prompts.
-
Move or install Filmora into the Applications folder when prompted.
-
Open Filmora.
-
Allow any necessary macOS security permissions.
The first time you launch the program, macOS may request access to folders, media, microphone, or other resources depending on the features you use.
B. Filmora Installer File (.dmg)
Mac software is commonly distributed through a .dmg disk image, and Filmora's Mac installer follows the same general format.
When you open the DMG, macOS mounts it like a temporary disk.
From there, follow the on-screen instructions to install Filmora.
Once installation is complete, the original DMG is no longer required. You can eject the mounted installer and delete the downloaded file if you want to recover storage space.
C. Minimum macOS System Requirements
Current Filmora releases support relatively recent versions of macOS and are compatible with both Intel-based Macs and newer Apple Silicon hardware.
A sensible starting configuration includes:
-
A supported modern version of macOS
-
At least 8 GB RAM
-
16 GB RAM for smoother HD and 4K editing
-
Roughly 10 GB of free space for installation
-
Considerably more free space for project media
-
A supported Intel processor or Apple Silicon Mac
If you own an M-series Mac, Filmora is generally a good fit because modern versions are designed to work with Apple Silicon.
Again, storage matters.
A 10 GB installation requirement does not mean a Mac with only 11 GB free is ready for video editing. Your original footage, rendering files, preview cache, proxy media, AI downloads, and exports can consume tens or even hundreds of gigabytes.
IV. Installing Filmora Step-by-Step
A. Running the Installer Wizard
After downloading Filmora, open the installer.
Windows users may receive a User Account Control message asking whether the installer is allowed to make changes. Confirm only after checking that the installer came from Wondershare.
The installation wizard then downloads or copies the required program files.
Do not shut down the computer or disconnect your network while this is happening.
B. Choosing Install Location
Filmora normally chooses an installation location automatically.
For most users, I suggest leaving the default location alone.
Changing it can make sense if your primary drive has limited space and you have another fast SSD available.
However, keep the distinction between program location and media storage in mind.
Even if Filmora itself is installed on your system drive, your video projects, cache, proxies, and exports can often be saved elsewhere.
For creators with large video libraries, moving project media to a second SSD usually saves far more space than relocating the Filmora application.
C. Completing Installation
When installation finishes, launch Filmora and allow it to initialize.
The first launch can take longer than later launches because the program may need to prepare components, check your hardware, load resources, or download updated information.
You can then create a new project and start importing media.
Before starting an important project, I recommend checking the default project resolution and frame rate.
Matching them to your source footage can prevent unnecessary rendering and quality problems later.
V. Creating a Wondershare ID and Account
A. Sign-Up Process
You can install Filmora before creating an account, but a Wondershare ID becomes important once you want to activate a license, use cloud services, manage purchases, or access certain online features.
Inside Filmora, select the account or login option.
You can create a Wondershare ID using an email address and password.
Use an email address you actually check. Your license information, account security messages, receipts, and subscription information may be connected to it.
B. Logging in with Google or Facebook
Depending on the current login options in your region, Filmora may allow third-party account sign-in, such as Google or other supported account services.
This is convenient because you have one fewer password to remember.
However, make sure you continue using the same sign-in method.
One common licensing problem occurs when someone buys Filmora under one email address and later signs in with another account. The software then appears unactivated even though the person already paid.
C. Activating Your License
After purchasing Filmora, sign into the Wondershare ID linked to the purchase.
Filmora should recognize the active plan and remove the trial export restrictions associated with your license.
If the software still appears to be in trial mode:
-
Confirm your internet connection.
-
Check the email address used for purchase.
-
Sign out and sign back in.
-
Restart Filmora.
-
Verify that your subscription or license is still active.
Do not immediately buy Filmora again because the first license does not appear. Account mismatch is often the real problem.
VI. Filmora Pricing and Licensing Options
A. Free Trial and Watermark Limitations
Yes, Filmora is free to download and try.
This is one of the easiest aspects of wondershare filmora download to misunderstand.
“Free download” does not mean the full desktop editor is permanently free with unrestricted commercial exports.
You can install Filmora and experiment with the editing interface without paying upfront. That is useful because you can test timeline performance, import your own footage, experiment with effects, and decide whether the workflow fits you.
The major limitation is export.
Videos produced using the free desktop version normally contain a Filmora watermark. For serious YouTube uploads, client work, business videos, or finished social content, that is usually enough reason to purchase a license.
B. Subscription Plans: Monthly and Annual
Filmora pricing can vary according to region, promotion, operating system, and storefront.
You may encounter monthly subscriptions, annual subscriptions, and bundles that include additional creative assets or AI resources.
Annual plans usually make more sense for people who expect to edit throughout the year.
A monthly option can be useful if you need Filmora for a short project and do not want a long commitment.
Before paying, check whether the plan renews automatically.
Also look carefully at optional extras. Creative asset libraries, music services, and AI-related services may be billed separately from the basic Filmora software.
C. Perpetual and Lifetime License
Filmora also offers a perpetual purchase option in some markets.
The word perpetual needs some explanation.
It generally means you can continue using the licensed major version covered by the purchase without maintaining an annual subscription. It does not necessarily mean every future major Filmora release will be included forever.
That distinction matters.
For example, a perpetual license tied to Filmora 15 may include Filmora 15 updates but not automatically grant ownership of Filmora 16, 17, 18, and every future generation.
Always read the upgrade conditions before buying.
D. Comparing Plans
For a casual creator, the decision is fairly simple.
Choose the free version when you are testing Filmora and do not care about watermarked exports.
Choose an annual subscription when you want ongoing upgrades and plan to edit regularly.
Choose a monthly subscription when you only need the program temporarily and that option is available in your region.
Choose the perpetual plan when you prefer a one-time purchase and are comfortable staying on the version covered by that license.
If you rely heavily on AI generation, premium assets, stock media, or cloud storage, compare those allowances separately. The cheapest software license is not necessarily the cheapest complete workflow.
VII. Core Editing Features
A. AI Video Enhancer and Smart Tools
AI has become a major part of Filmora.
The AI Video Enhancer is designed to improve footage that looks soft, noisy, dark, or low-resolution. Depending on the source material and selected model, it can help produce a cleaner-looking result without requiring you to manually adjust dozens of settings.
Filmora also includes other smart tools designed to reduce repetitive editing work.
These can be useful for:
-
Removing unwanted objects
-
Detecting scenes
-
Creating short clips from longer content
-
Tracking subjects
-
Reframing video
-
Cleaning backgrounds
-
Generating or enhancing media
I would not treat any AI enhancer as magic.
A severely blurred or badly compressed clip will not suddenly become footage from an expensive cinema camera. What these tools can do is save time and improve material that already contains enough useful detail.
B. Templates, Effects, and Transitions
This is where Filmora feels particularly beginner-friendly.
Instead of manually animating every title and transition, you can browse ready-made designs and apply them to the timeline.
There are templates for:
-
Intros
-
Titles
-
Lower thirds
-
Social media videos
-
Product promos
-
YouTube content
-
Travel videos
-
Gaming edits
-
Slideshows
-
Vertical videos
Effects and transitions work in a similar way.
Drag one onto the timeline, preview it, adjust the duration or settings, and continue editing.
The danger is overusing them.
A clean cut is often better than putting a flashy transition between every two clips.
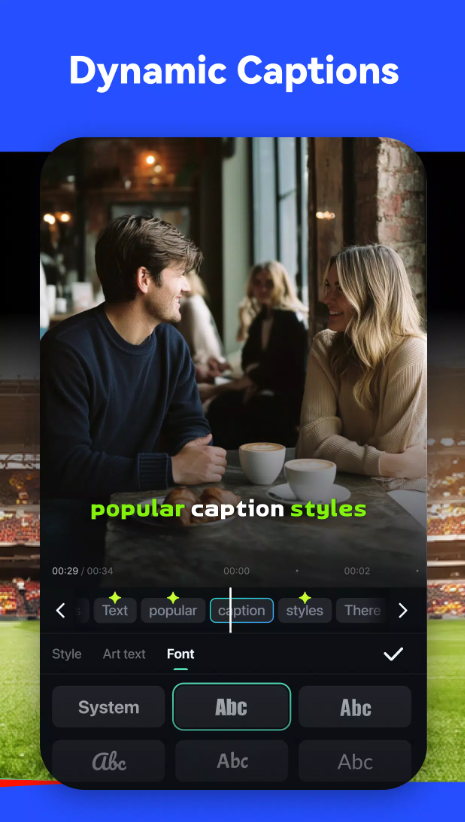
C. AI Captions and Text-to-Speech
Automatic captions are extremely useful for modern content creators.
Filmora can convert speech into text so you do not need to type every subtitle manually.
For TikTok, Instagram Reels, Shorts, tutorials, interviews, and talking-head videos, this can save a huge amount of time.
Still, review every caption before publishing.
Automatic transcription can misunderstand names, accents, slang, technical terminology, or speakers talking over one another.
Text-to-speech works in the opposite direction.
You provide text, and Filmora can generate spoken audio using supported voices. This can be helpful for explainers, prototypes, faceless videos, or temporary narration.
D. Background Remover and AI Music
Background removal used to be the type of job that sent beginners straight to a tutorial.
Modern Filmora tools can identify people and subjects automatically and separate them from the background with much less manual work.
That is useful for:
-
Talking-head overlays
-
Product videos
-
Gaming content
-
Social posts
-
Presentation videos
-
Virtual background effects
AI Music provides another shortcut by helping generate or provide music suited to a project.
When publishing monetized or commercial content, always check the licensing conditions attached to music and creative assets rather than assuming everything visible inside an editor has identical usage rights.
VIII. System Requirements and Compatibility
A. RAM, CPU, and GPU Requirements
For Windows, I would consider 8 GB RAM the absolute entry level and 16 GB the realistic target for modern editing.
A newer multi-core Intel or AMD processor will improve timeline responsiveness and rendering.
GPU performance becomes especially important when you use:
-
4K video
-
Hardware encoding
-
AI effects
-
Multiple effects
-
Color processing
-
High-resolution previews
Filmora supports GPU acceleration, so keeping graphics drivers updated can noticeably improve performance.
For Mac, Apple Silicon models provide a strong experience for this class of editor, particularly when combined with sufficient memory.
B. Disk Space Needed
The application itself needs roughly 10 GB of available storage, but video editing demands much more.
A few minutes of compressed smartphone video may seem small. High-bitrate 4K footage is another story.
Your storage must accommodate:
-
Original clips
-
Audio
-
Images
-
Project files
-
Proxy media
-
Render files
-
Cache
-
Downloaded assets
-
Final exports
If you intend to edit regularly, I strongly recommend an SSD.
A dedicated external SSD can also be useful for keeping projects separate from your system drive.
C. Supported Import and Export Formats
Filmora supports the common formats most creators encounter.
Typical video imports include formats such as MP4, MOV, MKV, AVI, WMV, WebM, and camera-oriented formats.
You can also work with common image and audio files.
Export options cover popular formats used for computers, mobile devices, websites, and social media.
For most users, MP4 is the easiest choice because it offers good compatibility across YouTube, phones, televisions, browsers, and social platforms.
IX. Updating and Uninstalling Filmora
A. Checking for Latest Updates
Filmora receives regular updates.
Inside the application, you can normally use the update-checking function to determine whether a newer build is available.
Updates may include:
-
New editing tools
-
AI features
-
Format support
-
Performance improvements
-
Bug fixes
-
Interface changes
-
Compatibility updates
Save your project before applying a major update.
That is a habit worth keeping with any video editor.
B. Version History and Changelog
Filmora maintains version information showing changes introduced across releases.
If an update changes something you depend on, checking the changelog can save a lot of confusion.
Filmora 15, for example, represents the current major desktop generation in 2026 and expands the software with newer AI and timeline workflow features.
If you are following an older tutorial made for Filmora 12 or 13, do not be surprised if buttons have moved.
C. Uninstall Guide for Windows and Mac
On Windows, you can uninstall Filmora through the installed apps or Programs section in Windows Settings or Control Panel.
Select Wondershare Filmora and choose Uninstall.
On Mac, quit Filmora first and remove the application using the standard macOS uninstall process.
Before deleting the program, remember that uninstalling the editor and deleting your project media are two different things.
Do not casually remove folders containing project files, footage, or custom assets unless you are sure you no longer need them.
X. Filmora for Content Creators
A. Editing for YouTube
Filmora is particularly comfortable for YouTube editing.
A normal workflow might look like this:
Import your footage, arrange the main clips, remove mistakes, add B-roll, balance audio, insert captions, add music, create titles, color-correct the footage, and export an MP4.
You can build fairly complex videos without learning a professional editing environment first.
For tutorials and gaming videos, screen recording and voiceover tools are useful additions.
For vlogs, templates and automatic subtitles save time.
The biggest beginner tip I can give is to focus on pacing before effects.
Removing boring sections usually improves a YouTube video more than adding another transition pack.
B. Editing for TikTok and Instagram
Filmora also works well for vertical content.
Set your project to a 9:16 aspect ratio and edit with the phone screen in mind.
Large captions, tighter cuts, vertical framing, sound effects, and quick visual changes generally work better than traditional widescreen editing.
Automatic reframe and short-video tools can help convert existing horizontal footage for vertical platforms.
Still, preview the final video before publishing.
Automatic framing cannot always predict which person, object, or part of the scene matters most.
C. Tips for Beginners
Start simple.
For your first project, do not try every Filmora feature.
Learn these basics first:
-
Import media.
-
Put clips on the timeline.
-
Trim unwanted footage.
-
Add music.
-
Adjust volume.
-
Add text.
-
Use one or two transitions.
-
Export the project.
Once this workflow feels natural, move into keyframes, tracking, masking, AI tools, color grading, and more complicated effects.
Video editing becomes much easier when you learn it layer by layer.
XI. Filmora vs. Competitor Software
A. Filmora vs. Adobe Premiere Pro
Premiere Pro is a professional editing platform with deeper workflow control, stronger integration with Adobe's creative ecosystem, and extensive support for professional production environments.
Filmora is easier to learn.
That difference matters more than the number of features.
If you are building commercial productions, working inside an Adobe workflow, collaborating with professional post-production teams, or need extremely detailed control, Premiere Pro has obvious advantages.
If you simply want to make a good-looking YouTube video this afternoon, Filmora can be much faster to understand.
B. Filmora vs. DaVinci Resolve
DaVinci Resolve is one of Filmora's toughest competitors because Resolve offers an extremely powerful free version.
Resolve is especially strong for color grading, professional audio, visual effects, and high-end editing.
However, it is considerably more intimidating.
Filmora is built around reducing complexity. Resolve is built around giving you professional-level control.
For beginners, Filmora wins on ease of use.
For users willing to invest time learning a deeper system, Resolve offers enormous long-term potential.
C. Filmora vs. CapCut
CapCut competes with Filmora most directly in social content.
Both platforms emphasize quick editing, templates, captions, AI-assisted tools, effects, and vertical video.
CapCut feels particularly connected to short-form social media workflows.
Filmora feels more like a traditional desktop video editor that has adopted modern social and AI features.
For a 20-second TikTok, I may choose CapCut.
For a 15-minute YouTube video involving many tracks, B-roll, titles, voiceover, and more detailed timeline work, Filmora can feel more comfortable.
XII. Safety and Trust Considerations
A. Verifying the Official Download Source
The safest Filmora installation is the one downloaded directly from Wondershare or from an official mobile app store.
Check the website address before downloading.
This is especially important when searching wondershare filmora download, because third-party software sites may appear alongside the official page.
A legitimate installer should come from the product publisher rather than from an unknown file-hosting page.
B. Avoiding Cracked or Third-Party Versions
Searching for “Filmora crack,” “Filmora full version free,” or “Filmora no watermark crack” is a bad trade.
Modified installers can include:
-
Malware
-
Password stealers
-
Adware
-
Crypto miners
-
Remote-access tools
-
Modified system files
Even when a crack appears to work, updates can break it and cloud features may fail.
You are also trusting an unknown person with software that reads your personal video files.
If the paid version is outside your budget, use the legitimate Filmora trial or consider a genuinely free editor instead.
C. Privacy Policy and Data Security
Filmora includes online account services, AI tools, cloud functionality, downloadable assets, and other connected features.
That means some functions depend on transmitting information to online services.
Before uploading sensitive business footage, private family recordings, unreleased client projects, or confidential material to an AI feature, check how that particular feature processes data.
Also use a unique password for your Wondershare ID and keep your operating system and Filmora installation updated.
XIII. Filmora Mobile App
A. Downloading Filmora on Android
Android users can find the Filmora mobile video editor through Google Play.
Search for Filmora and check the publisher before installing.
Tap Install, wait for the download, and launch the application.
You can then create a project using videos and photos stored on your phone.
Android may request photo, video, microphone, camera, or notification permissions depending on what you want to do.
Only grant permissions required for the features you actually use.
B. Downloading Filmora on iOS
On an iPhone or iPad, open Apple's App Store and search for Filmora.
Select the official Wondershare application and tap Get.
Authenticate through your normal Apple account method and wait for installation to finish.
The mobile version is particularly useful for editing footage you already recorded on your phone because you do not need to transfer the files to a computer first.
C. Mobile vs. Desktop Feature Differences
The biggest difference is workflow depth.
Mobile Filmora focuses on speed and touch-based editing.
Desktop Filmora gives you more room for:
-
Multi-track timelines
-
Larger projects
-
Detailed audio editing
-
Precision controls
-
Advanced effects
-
Keyboard shortcuts
-
Complex project organization
Mobile is better for convenience.
Desktop is better for longer and more complicated edits.
I see them as complementary rather than interchangeable.
XIV. Troubleshooting Common Issues
A. Installer Not Working
If the Filmora installer does not open, check the basics first.
Make sure the download completed correctly and that you downloaded the correct Windows or Mac version.
Restart the computer and try again.
On Windows, verify that you have permission to install software.
On Mac, check whether macOS security settings blocked the application.
You should also ensure you have enough free disk space and a stable network connection.
If the file appears corrupted, delete it and download a fresh installer from Wondershare.
B. Activation and Login Problems
If Filmora says you are using the free version after you already purchased a license, check your account before doing anything drastic.
Confirm:
-
You are online.
-
You used the correct Wondershare ID.
-
The purchase was made under the same email.
-
Your subscription has not expired.
-
You installed the correct Filmora version.
Sign out and back in.
If activation still fails, keep your purchase information available when contacting Wondershare support.
C. Update Failures
Update problems can happen because of unstable internet, insufficient disk space, security software, damaged program files, or a failed previous update.
Restart Filmora and your computer first.
Then verify available storage and internet connectivity.
If the built-in updater continues failing, downloading the newest official installer and reinstalling the program can often solve the problem.
Back up important project information before making major changes.
XV. Frequently Asked Questions
A. Is Filmora Free to Download?
Yes. Wondershare Filmora download is available without an upfront payment, so you can install the desktop editor and try its tools before purchasing.
However, the free desktop version is not equivalent to a full paid license.
The most important limitation for typical users is the Filmora watermark placed on trial exports.
You need an appropriate paid plan if you want clean exports without the trial watermark.
B. Which Devices Support Filmora?
Filmora supports Windows and macOS computers as well as Android phones and tablets, iPhones, and iPads through its mobile application.
For desktop editing, hardware performance matters almost as much as operating-system compatibility.
A supported computer with 8 GB RAM may run the program, but creators working with 4K video will have a much better experience with 16 GB or more, SSD storage, and stronger CPU/GPU hardware.
C. How to Fix Installation Errors
If Filmora will not install, work through the problem in this order:
Check that your operating system is supported, confirm you downloaded the correct installer, make sure enough storage is available, restart your computer, temporarily close unnecessary applications, check your internet connection, and download a fresh installer from the official website.
If the problem appears to involve graphics hardware after installation rather than the installer itself, update your GPU drivers.
Avoid solving compatibility problems by downloading random older Filmora installers from unknown websites. If you genuinely need an older release, use Wondershare's official archive where available.
Let's wrap things up
For someone searching for wondershare filmora download, Filmora remains one of the easier ways to move from basic video editing into a proper desktop timeline without immediately dealing with the complexity of software aimed primarily at professional editors.
The download and installation process is straightforward on both Windows and Mac, and you can test Filmora before paying. That makes it easy to import your own footage, see how smoothly it runs on your computer, experiment with captions and effects, and decide whether the workflow suits you.
Its biggest strengths are accessibility and speed.
Filmora combines traditional timeline editing with templates, transitions, automatic captions, AI Video Enhancer, background removal, AI music tools, text-to-speech, smart editing features, and social-media-friendly workflows. For YouTube creators, small businesses, students, vloggers, and beginners, that combination can remove a lot of the tedious setup that comes with more complicated software.
The trade-off is that the free desktop version places a watermark on exported videos, while some AI services, creative assets, and advanced resources can depend on the plan or credits you purchase. If you are considering a subscription or perpetual license, check exactly what is included rather than choosing based only on the headline price.
My recommendation is simple: download the official Filmora version first and build a small test project using your own footage. Trim several clips, add music, create captions, try an effect or two, and export the result. If the editor feels comfortable and performs well on your computer, you will have a much clearer reason to pay for it than any feature list can give you.
For beginners who want something more capable than a simple phone editor but less intimidating than a full professional post-production suite, Filmora still occupies a very useful middle ground.